
How to replace links in Confluence Cloud after a URL change
For a few links, edit their destinations in the Confluence Cloud editor and publish each page. When the same address appears across many pages, first map the old URLs to their replacements, then preview a small batch before saving.
A domain migration needs more care than changing one address: paths, query strings and heading links may need to survive the move. Use the examples and downloadable worksheet below to check the mapping.
Map the old and new URLs first
Write down the source page, old URL, intended replacement and responsible owner. Open the replacement as an intended reader. Check that it contains the right instructions, not just that it loads.
Record exceptions before making a broad change. A documentation domain may have moved while its support portal stayed put. Some old paths may now redirect; others may have entirely different replacements. Search results alone are not proof that you have found every occurrence on every page.
Keep one row per source page and URL. This CSV worksheet has columns for the mapping, reviewer, published version and recheck outcome. It is a planning file, not an app import format.
Replace a link in the Confluence Cloud editor
For a short list of pages, use the native editor. You need edit access to each source page.
- Open the source page and choose Edit.
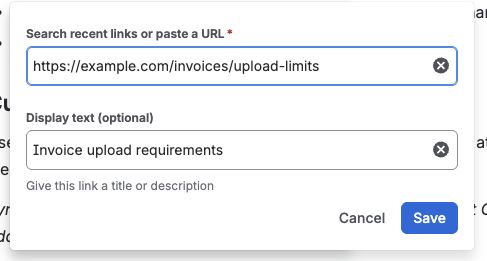
- Select the linked text, then Edit link in its floating toolbar.
- Replace the address in Search recent links or paste a URL. Review Display text separately.
- Select Save in the dialog, then Update on the page. The dialog alone does not publish your edit.
- Open the link from the published page and confirm the intended destination and section.
For a link to a heading, copy its section link rather than guessing the fragment. Atlassian’s links and anchors documentation explains these destinations. If a reader cannot open the new page, check content access before changing another URL.
If this is all the work you have, keep the worksheet and stop here. You do not need an app to correct a small set of links.
Choose exact or base matching
When a tool offers bulk URL replacement, check what it matches. Replacing an entire destination and replacing a shared domain or path prefix solve different problems. Neither necessarily changes the words readers see.
Compare the old address with the intended new address
One destination changed
Exact URL
Match a complete old URL and replace it with one verified destination.
Check the full address
Paths stay consistent
Base URL and path
Change a shared origin or prefix; keep the remaining path, query and fragment.
Check path boundaries
Content was reorganized
Individual mappings
Map each old destination separately when the new site uses different paths.
Review each exception
The examples below describe Link Steward’s matching rules. Other tools may normalize or match URLs differently. All addresses are illustrative.
Scroll the table horizontally to see the URL examples.
| Rule | Before | After |
|---|---|---|
| Exact URL | https://docs.example.com/old-guide | https://docs.example.com/new-guide |
| Base: old.example.com/docs → new.example.com/help | https://old.example.com/docs/setup?lang=en#install | https://new.example.com/help/setup?lang=en#install |
| Outside that path boundary | https://old.example.com/docs-old/setup | Unchanged: /docs-old is not within /docs. |
For base matching, enter the current and replacement bases without a query string or fragment. A new HTTPS domain does not guarantee that every retained path exists. Check representative child paths and handle exceptions separately.
Preview a batch before saving it
Link Steward can replace link destinations on up to 20 selected Confluence pages at a time. I build this app. The walkthrough below uses sample pages in its development installation; the product page has the full video and installation details.
- Open Apps → Link Steward from Confluence’s sidebar, choose the space and run Scan space as a space administrator.
- In All links, search for the old address. Load remaining results while Load more results is available. Choose All work states and All link results if you are migrating links that still work.
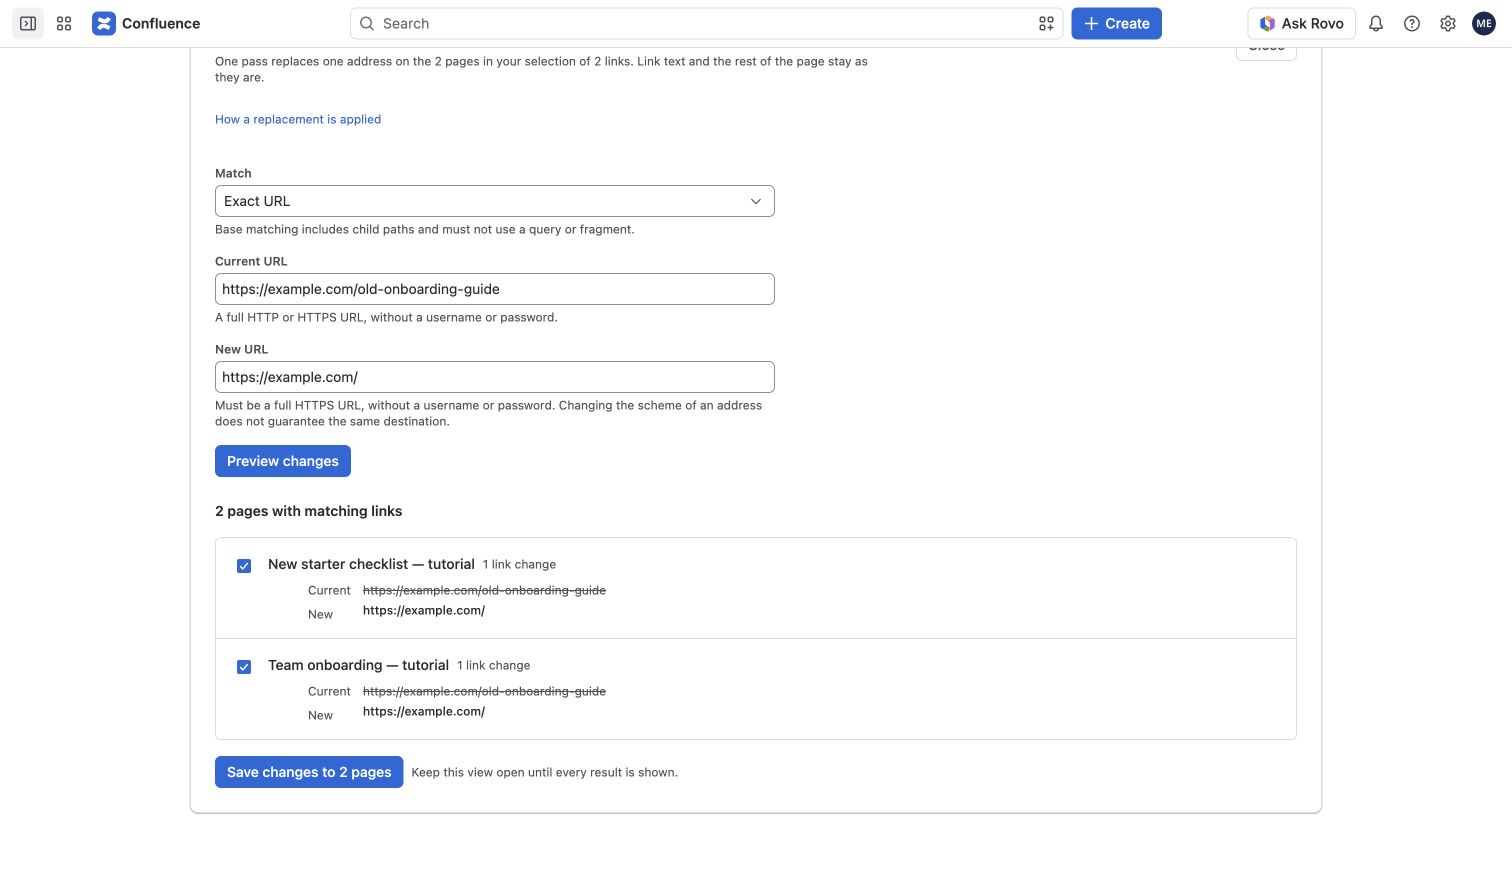
- Select the relevant rows and choose Replace links. Under Match, select Exact URL or Base URL and path.
- Check Current URL, enter an HTTPS destination in New URL, and choose Preview changes.
- Read every proposed old/new URL and source page. Untick exceptions. One pass applies one replacement rule to the selected pages.
- Select Save changes to … pages only after reviewing the preview. Keep the panel open until every page shows a result.
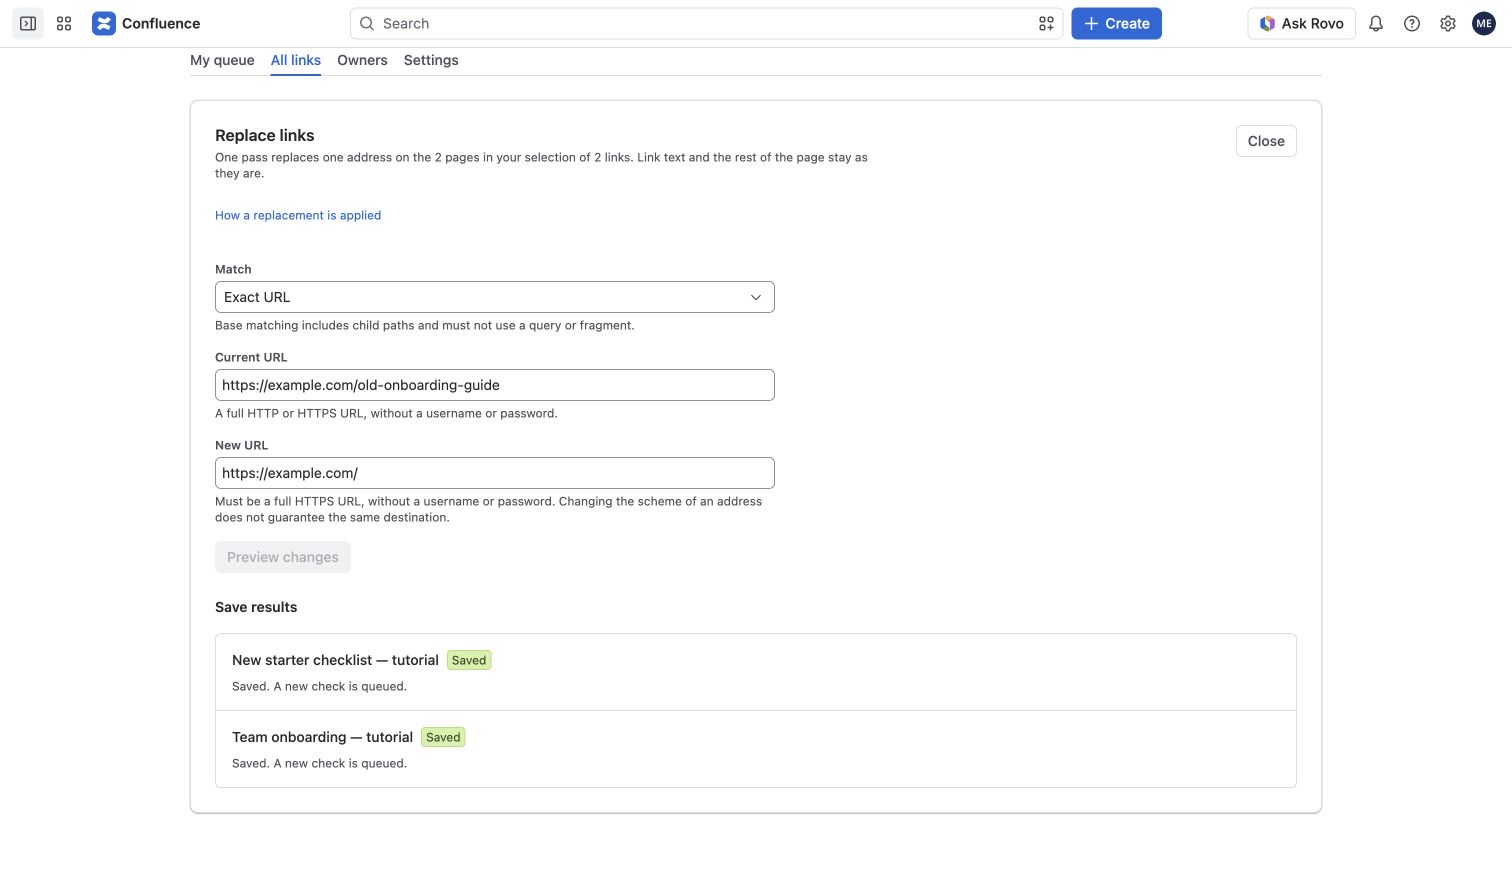
A successful save creates a new Confluence page version and queues a recheck. Link text stays unchanged. If the label itself contains an old product name or domain, edit that text separately in Confluence. The app changes supported hyperlink and Smart Link destinations; it does not find and replace ordinary page text or third-party macro internals.
Verify the published result and recover a failed page
Open the corrected link from the published source page. Check the destination, the heading and the visible label. A successful HTTP response proves reachability for that request; it does not establish that the content is the right replacement.
In the app, close the replacement panel, choose All work states and All link results, and refresh after the recheck completes. The old destination can appear as Link removed / Resolved; the new destination has its own check result. Use the checked timestamp to distinguish a fresh result from an earlier scan.
- Some pages fail: keep the per-page outcomes. Saved pages stay saved. Investigate failed pages and retry those; do not assume the batch rolled back.
- A page or draft changed: resolve the conflicting edit or unpublished draft, then create a new preview. The previous preview is no longer safe to apply.
- You lack edit access: ask an authorized page owner to review and publish the correction.
- The mapping was wrong: review the page’s version history and restore the appropriate earlier version. Restoration affects the page, so check for other people’s changes before choosing a version.
Keep each published version and recheck outcome in the worksheet. When all intended pages are checked, record the remaining exceptions instead of counting them as completed work.
For ongoing maintenance, see how to find and fix broken links. For Link Steward’s supported links, permissions and limits, use the replacement user guide.
Scope of this walkthrough. Native link editing was checked on 14 September 2026. The two-page exact replacement, save receipts and recheck were captured on 20 September 2026 with synthetic pages in a development installation. Base matching and partial-save recovery are described from the released application’s rules and tests, not presented as additional browser experiments. This article covers Confluence Cloud.